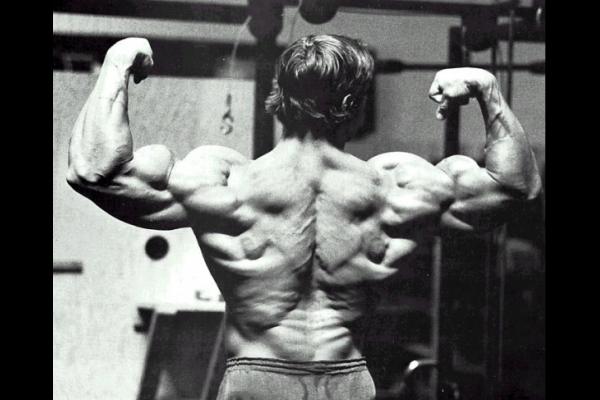
Choosing the right back exercise on a certain training is key to trainging your back properly. A big back is the difference between some pretty boy working out at the gym, training his chest and arms, and a man that has actually has spent time training hard in a gym, and is most likely stronger then you might think. This definitely doesn't sound like a typical 1RM Performace post, however, some of our readers have been asking for some tips for a bigger back, so here we go.
On a slow day while working at Abercrombie & Fitch, I was asked by a manager, George Kuan, how much I bench. Yes, I used to work at A & F during high school and college. I told George that I had benched 355 and his response was, “nice, I knew you'd have a big bench, because you have a big back.”
The Ultimate Cue: Pack and Pull
The first and most important thing to cover before getting into my favorite exercises to train the back, is the cue “pack and pull”. Charlie Weingroff has really brought this cue to the forefront of strength and conditioning. He is the first strength coach to explain the benefit in its simpest form, activating your rotator cuff. In Training=Rehab Rehab=Training he explains packing will allow you to train your RC in more then just your traditional internal external rotation exercises.
Packing means to retract and depress your scapula. In other words, pull your shoulder blades down and away from your ears. By applying this cue you are turning your rotator cuff on and creating tension in your upper body. Pulling is simply completing the rep, whether pulling vertically (i.e. pull up or Lat pull down) or pulling horizontally in a row (i.e. inverted, bent over, single arm). Pack and Pull.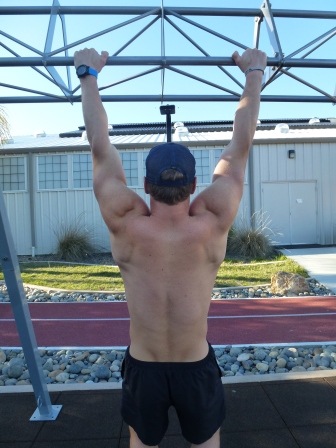
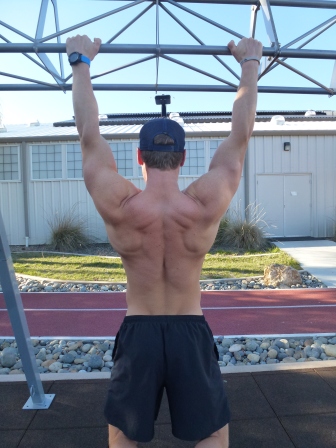
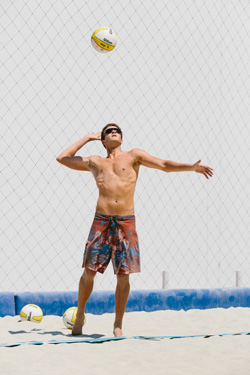
In the pictures above, you can see the difference between a packed scapula on the right and the common relaxed scapula on the left. In terms of posture, you see much better head positioning on the right, as well as a more rigid and tense spine. A small cue that can do so much.
Applying this cue properly has the potential to drastically improve the way your shoulder feels during a workout. Most guys that train “hard” often complain of nagging shoulder issues. Although previously covered in How To Bench Press The Right Way, the nagging shoulder pain is often a result of the head of your humerus, rolling anteriorly. This places stress on the tendons and ligaments in the front of your shoulder, whether it’s your biceps tendon, AC joint, etc.
Rotator Cuff 101
 Now, let’s briefly go over the role of your rotator cuff. When it comes down to it, an activated RC will center the head of the humerus in your glenoid fossa. So really, when you train your back properly, you are simultaneously training your RC. What happens when you train your back the wrong way? Well, you guessed it, a strained RC is right around the corner.
Pack and Pull, got it. Now lets get to the good stuff. Here are my top 5 lifts to build a better back:
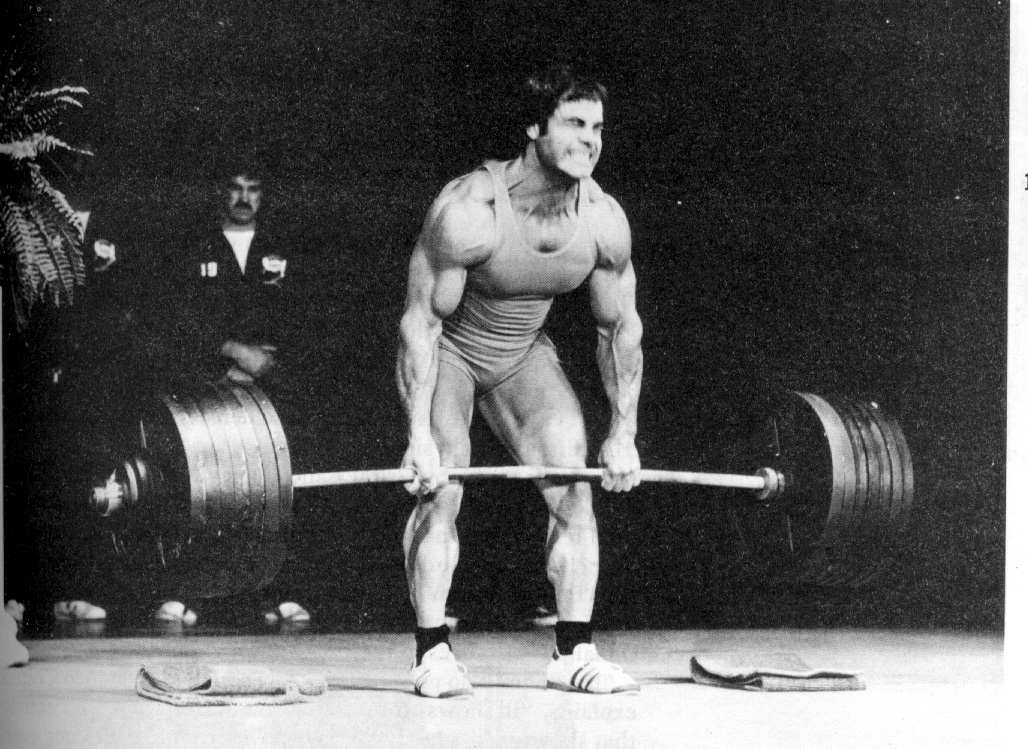
1.) The Deadlift
My first and most powerful exercise to choose when it comes to a big strong back, is, yup, you guess it; the deadlift. A deadlift requires massive amount of activation from your entire back, not to mention your lower body. Your lats, as previously mentioned in The Anti-shrug, play a huge role in stabilizing your spine as you pull and they make or break your deadlift. If you can’t fire your lats properly, your form will fail, and you will begin generating force from your spine, big no no.
If you’ve ever taken a few weeks off from deadlifts, then gone back and hit a 5x5 workout you will certainly feel your traps the next day. Deadlifting clearly trains your upper, mid, and of course lower traps. Each portion of your traps, along with your erectors, plays an important role in protecting the spine, and maintaining your posture throughout the pull. Although you might not feel as if you are using your RC when you pull, trust me when I say: Your RC and rhomboid are getting some serious work, maintaining the positioning of your scapula as you’re a pulling the weight from the ground.
It is hard to truly explain the potential of this lift, you've got to feel it to believe it.
2.) Pull Ups (Including weighted)
The pull up is my second favorite exercise to build a bigger stronger back. In my opinion, the pull up is the greatest body weight test, when done properly. A trip to a local gym will show you a bunch of different pull up variations. You’ll see the neutral grip(fist with thumbs pointing towards you), over hand (palms facing away), underhand (palms facing you), and a wide overhand grip. As mentioned previously, one of the most important cues to remember when doing a pull up is packing your scapula. If you’ve never done a pull up this way, it’s hard to say you’ve ever really done a pull up. The pack will enhance the pull you get within the concentric and eccentric phase of the movement, and of course maintain the correct biomechanical position of your humerus.
If at first you cannot maintain the pack, mentally and physically try and pack through each rep. In time, you will be able to maintain the pack throughout all of your reps.
There is one type of pull up that makes it impossible to maintain a packed position - the kipping pull up. Athletes and clients alike ask why I don’t allow them to kip. After explaining the role of the rotator cuff they soon understand. The goal is to keep athletes strong and healthy, not to see how many pullups they can do and how fast they can do them.
Pull Up Variations
I know it’s not easy for a lot of people to do a pull up, so to make it easier, here are some progressions we use to get someone to complete a full pull up.
1.) Eccentric Pull up- get some help or jump up to the bar. When your at the top, pack those scapulas and slowly lower yourself down. In time, you will need less and less of a jump, since you will be able to use your lats to “pull up”.
2.) Super band Pull up- For this progression, wrap a super-band around the bar, and stick your knee in the loop at the bottow. Start with a thick band and work your way down. In time you will work down to no bad at all. It’s a great way to accomplish an assisted pull up without a $5k machine!
When you have mastered the body weight pull up, it’s time to crank up the intensity with additional loads. The easiest and safest way to load them up is with a neutral grip, about shoulder width apart. The further you move your hands from the midline of your body the harder it will be. (think about trying to hold a 25lb plate at your side or with your arms extended to make a T.) Play around with different grips at different loads. My personal favorite is the neutral grip for sets of 4-6.
3.) Free Standing Single Arm Dumbbell Row
My third favorite exercise to for a bigger stronger back also involves a lot of core strength, the free standing single arm dumbbell row. This is my favorite rowing exercise for my footnall players and is a killer for everyone when done right.
To understand the beauty of the exercise we first have to go over the starting position.
- Sets your feet a little wider then shoulder width apart.
- Hinge at the hips, throw your butt into the next town, making sure to keep a vertical tibia.
- Pack those scapula, fire up the anti shrug, extend the arm without the dumbbell behind your body, making sure to create tension with a tight fist.
- Feel for a neutral spine, and lock your head over your neck, maintaining a neutral position. Your eyes should be focused on the floor a few feet in front of your eyes. Crush the weight on the floor with a death grip and get it going. Make sure you have created tension within your core to prohibit rotating during each rep.
There are several underlining benefits of this row variation. First, core strength. You are training rotary stability, activating your anterior core, and training your ability to resist flexion. Second, you are improving you ability to hip hinge. Third, you are training your thoracolumbar fascial line.
https://www.youtube.com/watch?v=aJH1LFj0xfg
If this varitation is to difficult to master at first, work your way up to it. start with a traditional row with your left hand and left knee on the bench, spine straight, scapula packed. After 4 weeks of traditional rows advance to a rowing with both feet parallel on the floor, one hand on the bench or dumbbell rack, maintain the pack, keep a long spine, and resist rotation. After 4 weeks you should be strong enough to move to a free standing db row.
4.) Inverted Row in TRX/under barbell
The inverted row is my go to exercise when I've already had a heavy day of pulling. The beauty of the inverted row is the lack of load on the spine. Stuart McGill, the most reknown spine researcher in the world, claims time and time again, that injuries occur when the load of your spine is greater it then it can handle. The load could be due to a single lift, or total load placed over time. To help mitigate the total stress throughout a workout here comes the inverted row.
An inverted row has the same potential as every row variation to increase size and strength of your back, it just requires more reps or requires you to load use an external load. How can you place a load while doing an inverted row? You can either place a plate on your chest, or throw on a vest. Both are effect, with the first being more practical within a commercial gym.
My favorite way to use an inverted row is within super sets. A great superset to finish up a workout ensure you'll feel the next days workout is: Bicep curls for a set of 6, inverted rows 12-15, then a farmers carry for about 40 yards. Finish 3 rounds of that and your forearms, biceps, and traps will be talking to you tomorrow.
The quick and dirty description of how to do an inverted row
1.) Get under the bar, knees bent if its your first time, or legs straight in front for those with my experience.
2.) Squeeze the bar with a tight grip. The grip option is personal preference. Underhand grip if you want some more activity within your biceps. I would suggest alternating between the two, so you maintain mobility within your shoulders. It would be easier to maintain a pack with an underhand grip.
3.) If your legs are extended in front of you, fire up the lats and glutes. At this point you should be stiff as a board (to further increase the tension within your body, take a deep breath into your belly and try to get fat. This will increase intra-abdominal pressure, as described in The Proper Way To Use a Power Lifting Belt)
Master this lift, and you are well on your way to getting a lot stronger in all your lifts!
My favorite way to use an inverted row is within super sets. A great superset to finish up a workout ensure you'll feel the next days workout is: Bicep curls for a set of 6, inverted rows 12-15, then a farmers carry for about 40 yards. Finish 3 rounds of that and your forearms, biceps, and traps will be talking to you tomorrow.
5.) Standing Row in Cable Column
My final go-to exercise that will ensure a bigger stronger back is a standing row in the Cable Column. This exercise requires an expensive piece of equipment, but it should be carried in all commercial gyms.
To some, this would be considered a “functional” exercise, which I guess is true because its completed while standing. I’d be lying if I said I came up with this exercise myself. I took this one from Eric Cressey’s Ultimate Shoulder Performance DVD, a great set if you like the shoulder or work with a lot of overhead athletes.
This exercise trains rotary stability, really tests your ability to pack your scapula, and does a lot to improve your posture.
The exercise is done by first facing the cable column. Grab the handle slight slower then shoulder height, take a step back, set your feet about shoulder width apart, and get into a quarter squat position. From here pack your scapula and get to work.
To take this exercise a step further, allow your shoulder to protract (think pushing your fist as far forward as possible), then pack your scapula, row, bring your arm to an extended position then protract again. Completing the row this way will fire up the seratus anterior a little more, giving you a little bang for your buck.
Closing notes
The exercises above are just 5 of my favorite exercises for a big strong back. There are a ton of other exercises that should be added to the list, however, I have to keep you coming back for more! Enjoy the exercises and get to it! A strong back will make or break your strength and your physique, get out there and crush some weights!